116202959376859456
前言
Nezha Monitoring: Self-hostable, lightweight, servers and websites monitoring and O&M tool.(Github)
准备工作
部署服务端
创建Github的SSO密钥
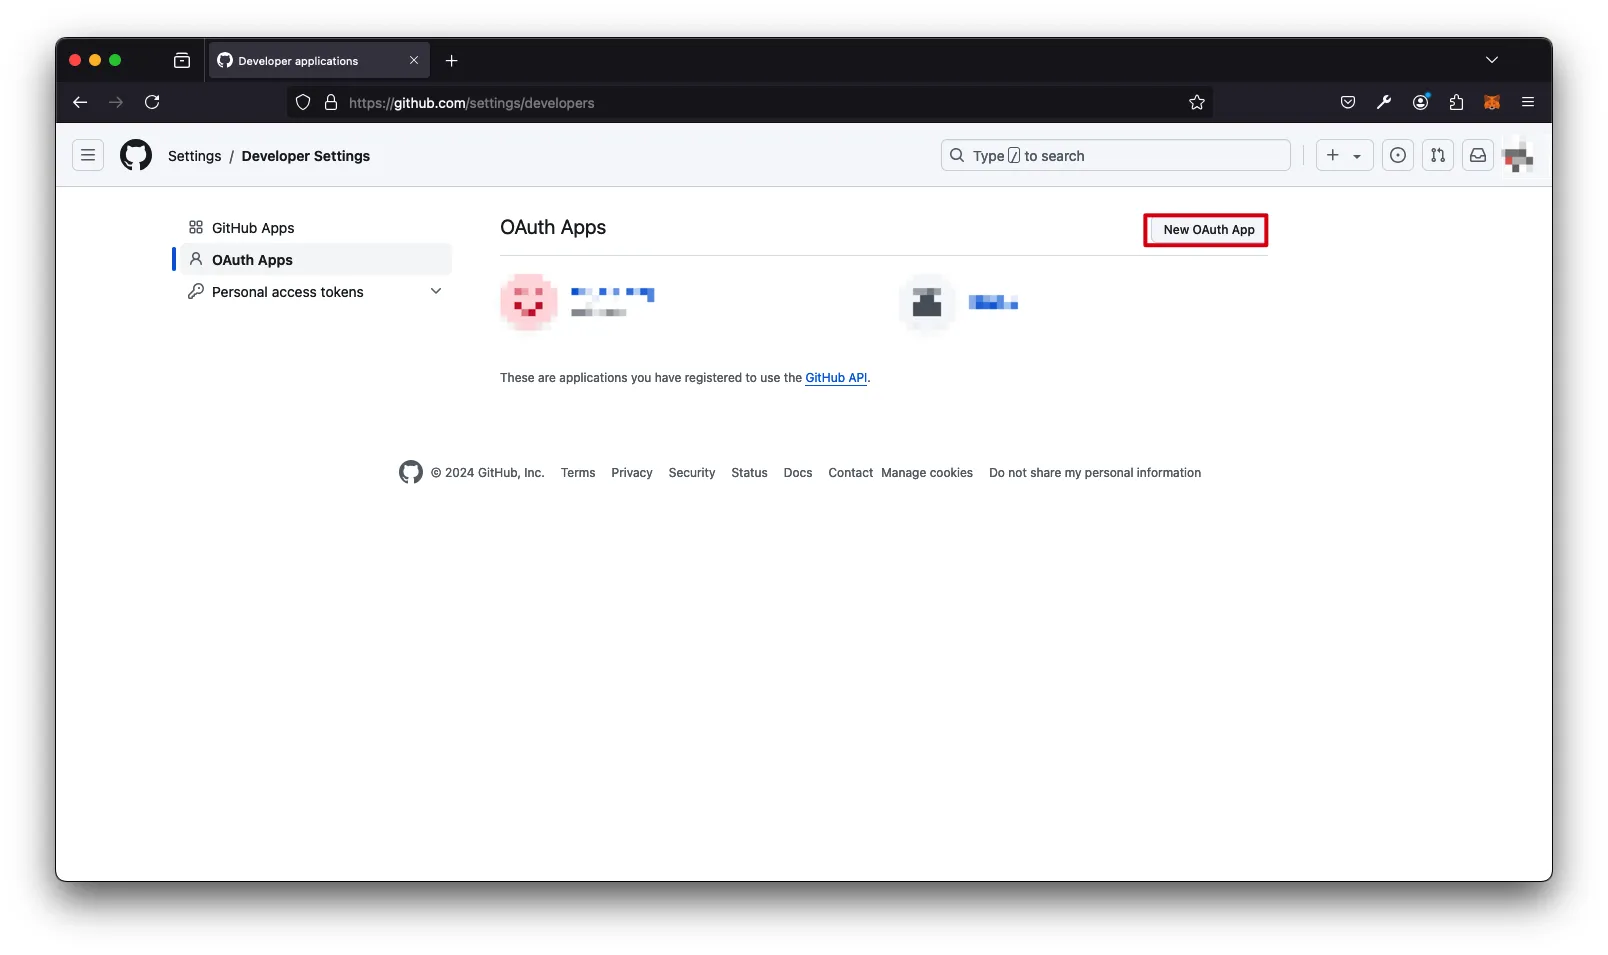
Application name填写任意名称->Homepage URL填写http://<domain_or_ip>:8008->Authorization callback URL填写http://<domain_or_ip>:8008/oauth2/callback->Register application

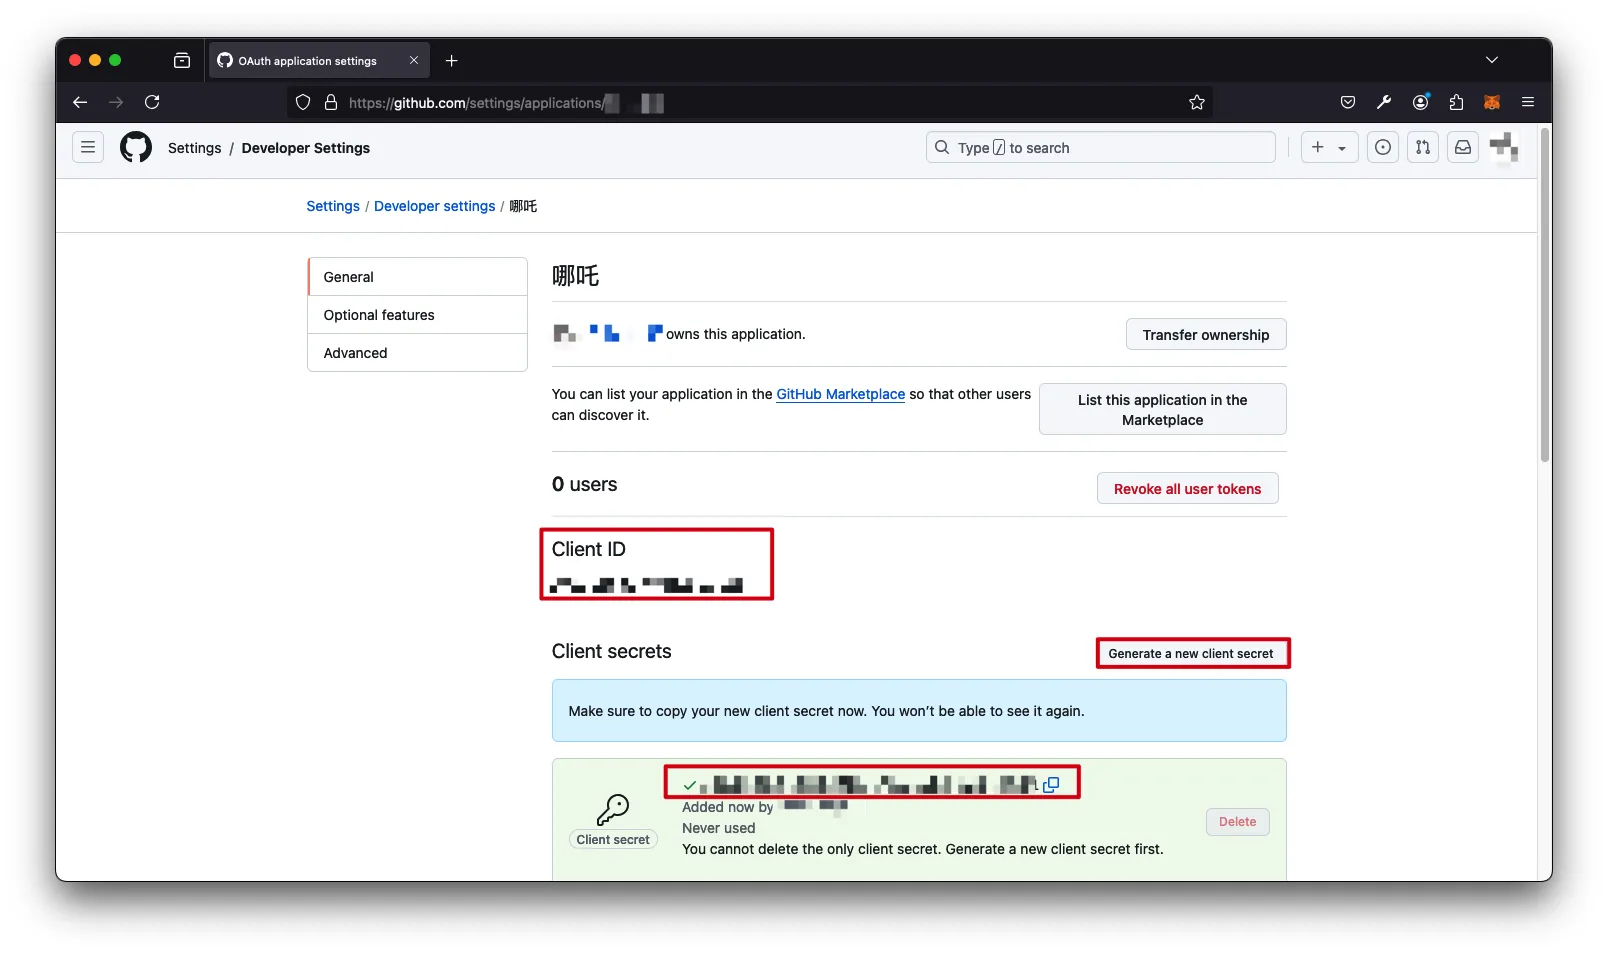
Generate a new client secret->获取Client ID和Client Secret
部署服务端
Github脚本
1
2
3
| curl -L https://raw.githubusercontent.com/naiba/nezha/master/script/install.sh -o nezha.sh
chmod +x nezha.sh
./nezha.sh
|
Gitee脚本
1
2
3
| curl -L https://gitee.com/naibahq/nezha/raw/master/script/install.sh -o nezha.sh
chmod +x nezha.sh
CN=true ./nezha.sh
|
配置
<github_oauth2_client_id>:上一步骤获取的Client ID
<github_oauth2_client_secret>:上一步骤获取的Client Secret
<github_username>:允许访问的Github账户的用户名(全小写)
1
2
3
4
5
6
7
8
9
10
11
12
13
14
15
16
17
18
19
20
21
22
23
24
25
26
27
28
29
30
31
32
33
34
35
36
37
38
39
40
41
42
43
44
45
46
47
48
49
50
51
52
53
54
55
| 请自行选择您的安装方式(如果你是安装Agent,输入哪个都是一样的):
1. Docker
2. 独立安装
请输入选择 [1-2]:1
哪吒监控管理脚本 v0.18.1
--- https://github.com/naiba/nezha ---
1. 安装面板端
2. 修改面板配置
3. 启动面板
4. 停止面板
5. 重启并更新面板
6. 查看面板日志
7. 卸载管理面板
————————————————-
8. 安装监控Agent
9. 修改Agent配置
10. 查看Agent日志
11. 卸载Agent
12. 重启Agent
————————————————-
13. 更新脚本
————————————————-
0. 退出脚本
请输入选择 [0-13]: 1
> 安装面板
> 修改面板配置
正在下载 Docker 脚本
关于 GitHub Oauth2 应用:在 https://github.com/settings/developers 创建,无需审核,Callback 填 http(s)://域名或IP/oauth2/callback
关于 Gitee Oauth2 应用:在 https://gitee.com/oauth/applications 创建,无需审核,Callback 填 http(s)://域名或IP/oauth2/callback
请输入 OAuth2 提供商(github/gitlab/jihulab/gitee,默认 github):
请输入 Oauth2 应用的 Client ID: <github_oauth2_client_id>
请输入 Oauth2 应用的 Client Secret: <github_oauth2_client_secret>
请输入 GitHub/Gitee 登录名作为管理员,多个以逗号隔开: <github_username>
请输入站点标题:
请输入站点访问端口: (默认 8008)
请输入用于 Agent 接入的 RPC 端口: (默认 5555)
面板配置 修改成功,请稍等重启生效
> 重启并更新面板
[+] Pulling 7/7
✔ dashboard 6 layers [⣿⣿⣿⣿⣿⣿] 0B/0B Pulled 3.9s
✔ 3fb2a2b49db6 Pull complete 0.7s
✔ 764594ff083c Pull complete 0.7s
✔ 689e416f9f1d Pull complete 0.4s
✔ dc4a7e920ee4 Pull complete 0.6s
✔ 66096196718a Pull complete 0.9s
✔ 7761fc4b9de4 Pull complete 2.3s
[+] Running 2/2
✔ Network dashboard_default Created 0.1s
✔ Container dashboard-dashboard-1 Started 0.2s
哪吒监控 重启成功
默认管理面板地址:域名:站点访问端口
* 按回车返回主菜单 *
|
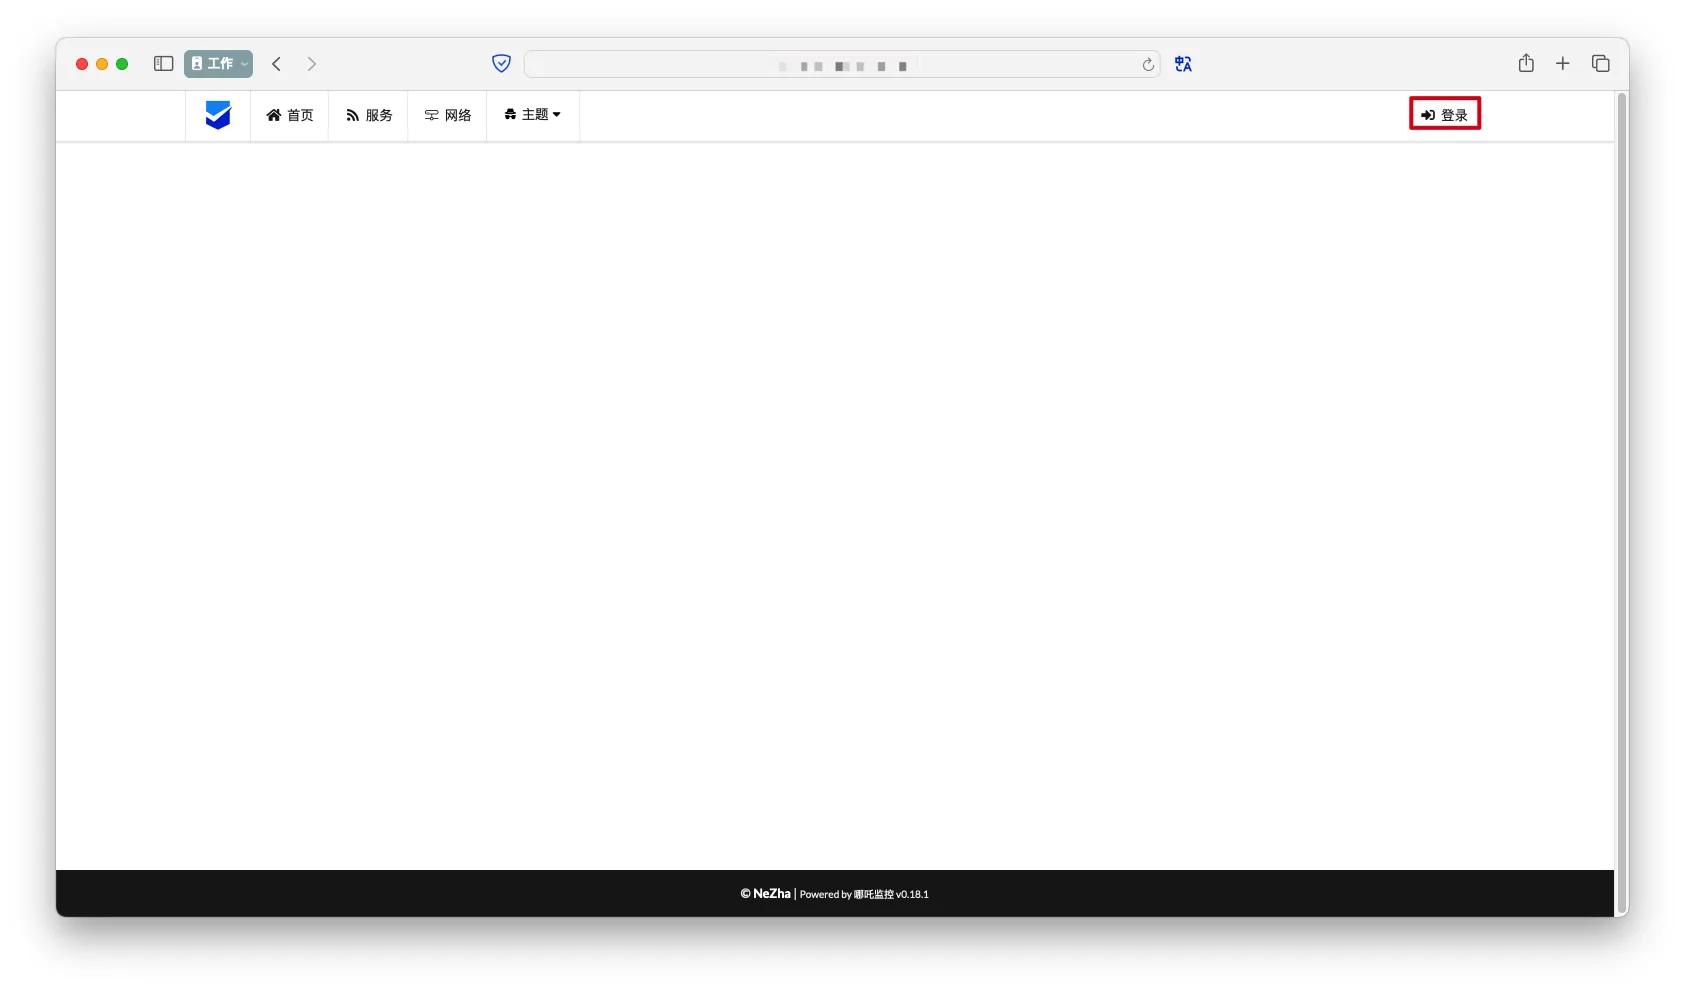
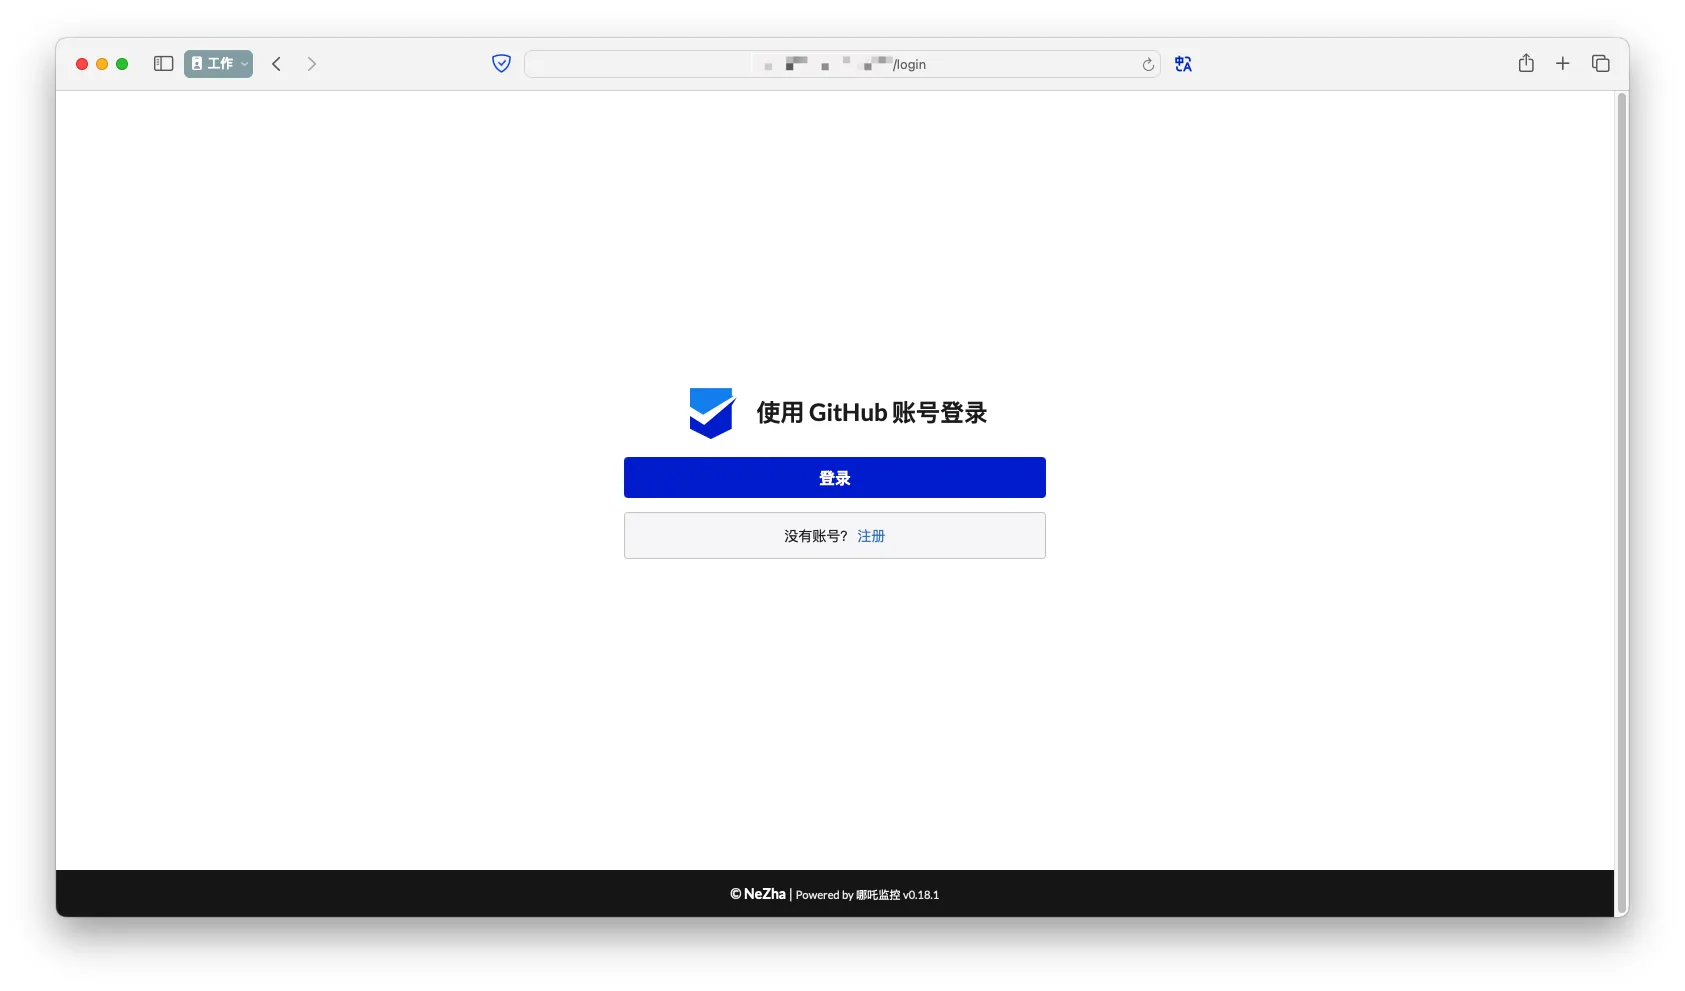
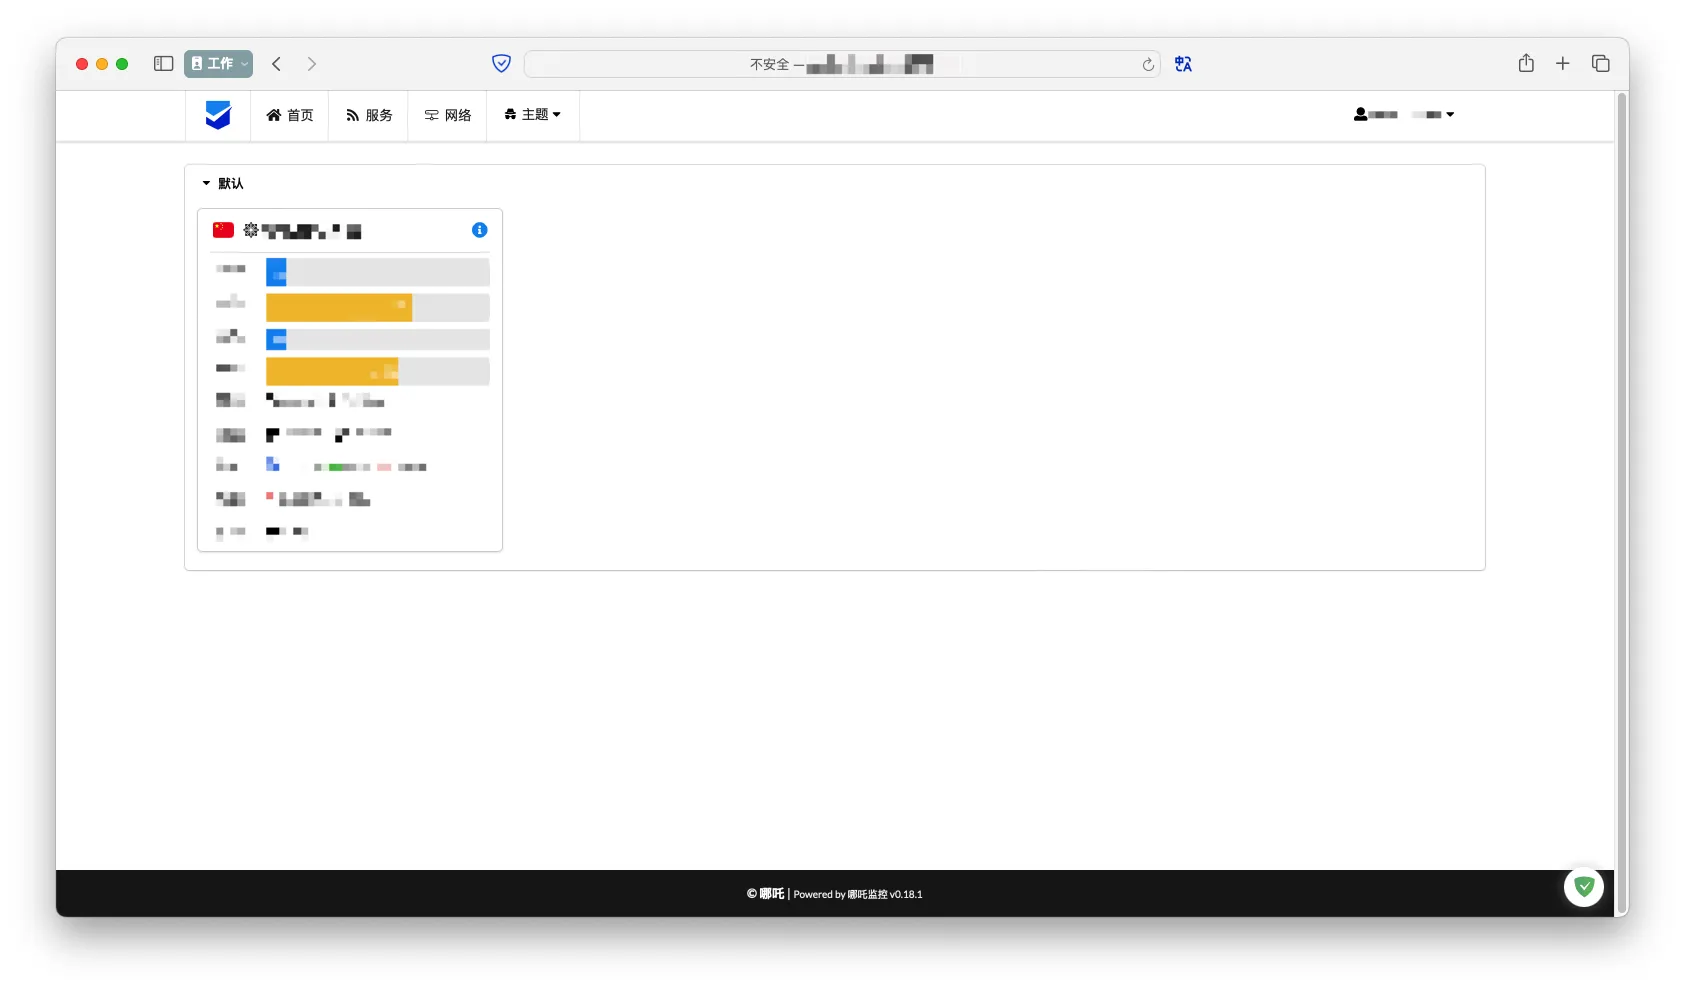
登录
- 访问
http://<domain_or_ip>:8008->登录
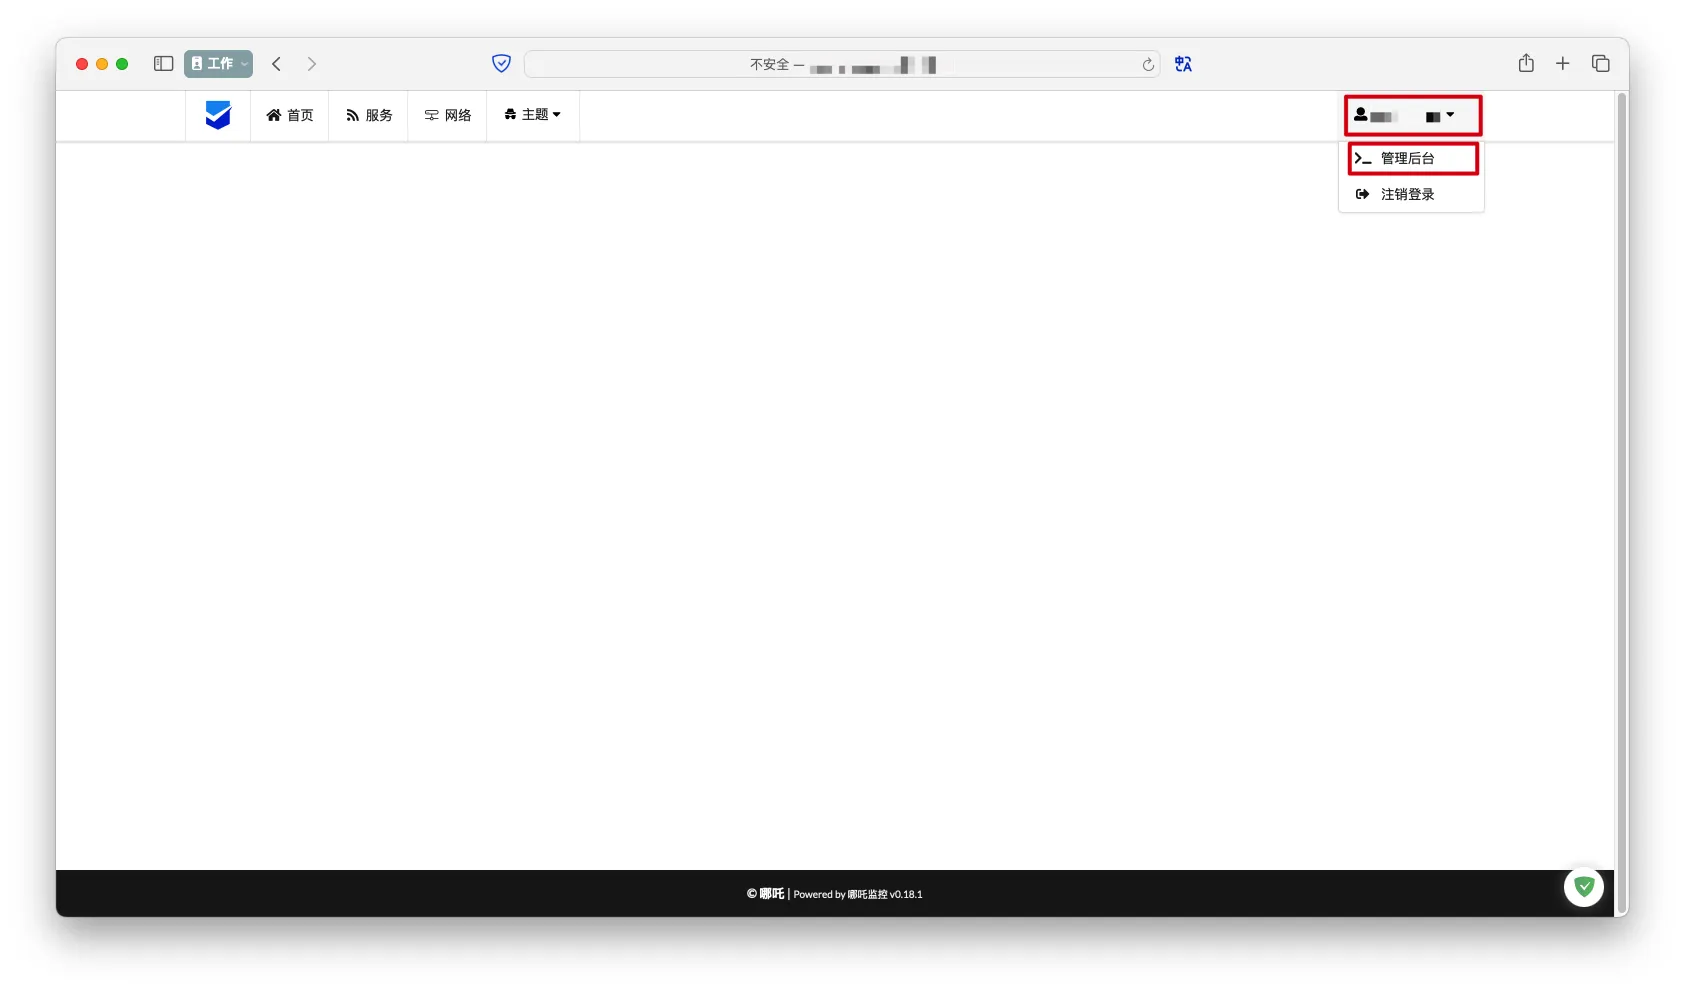
进入管理员后台
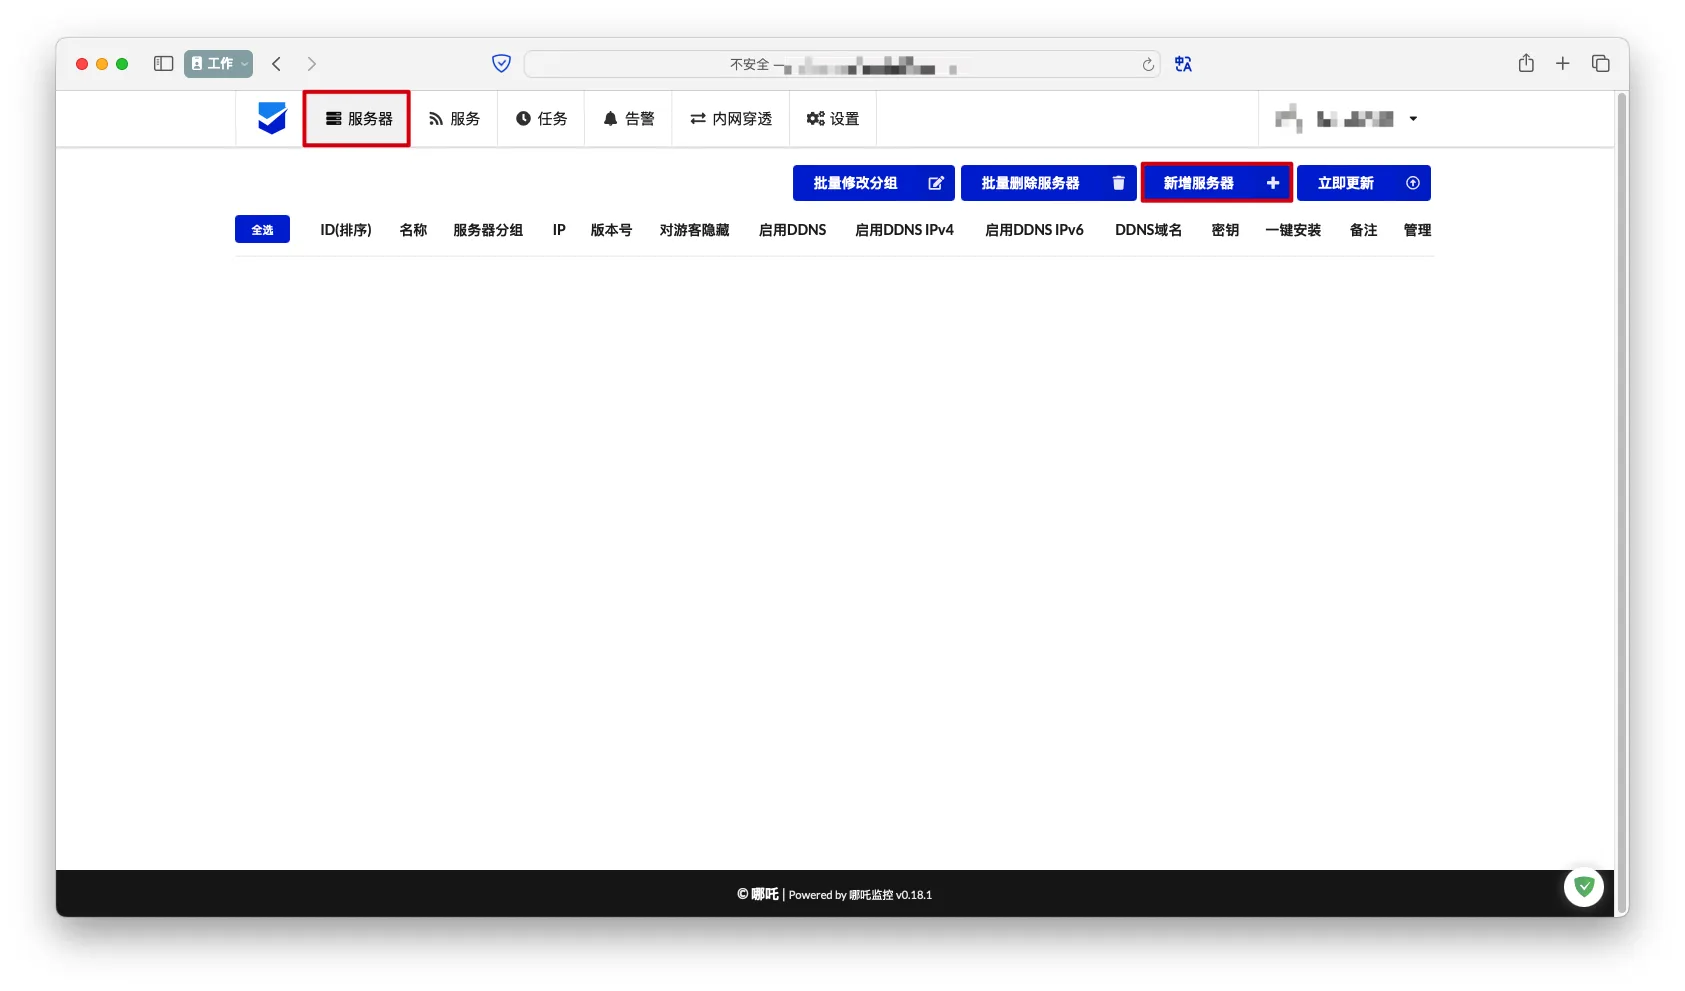
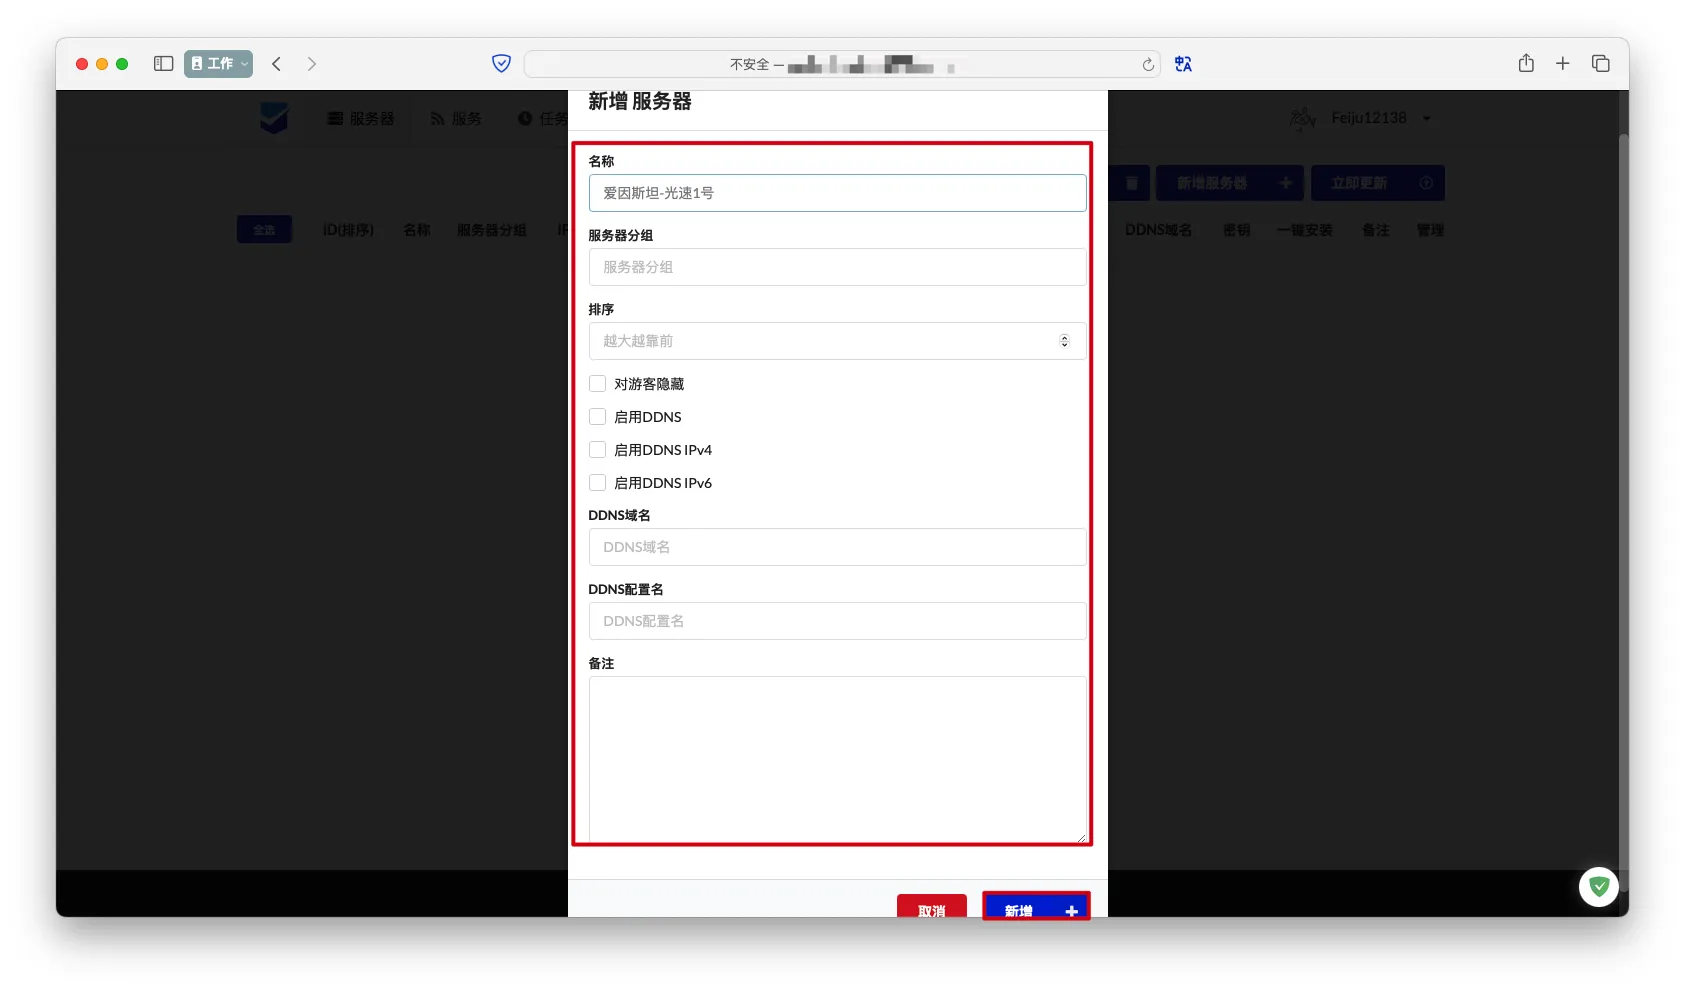
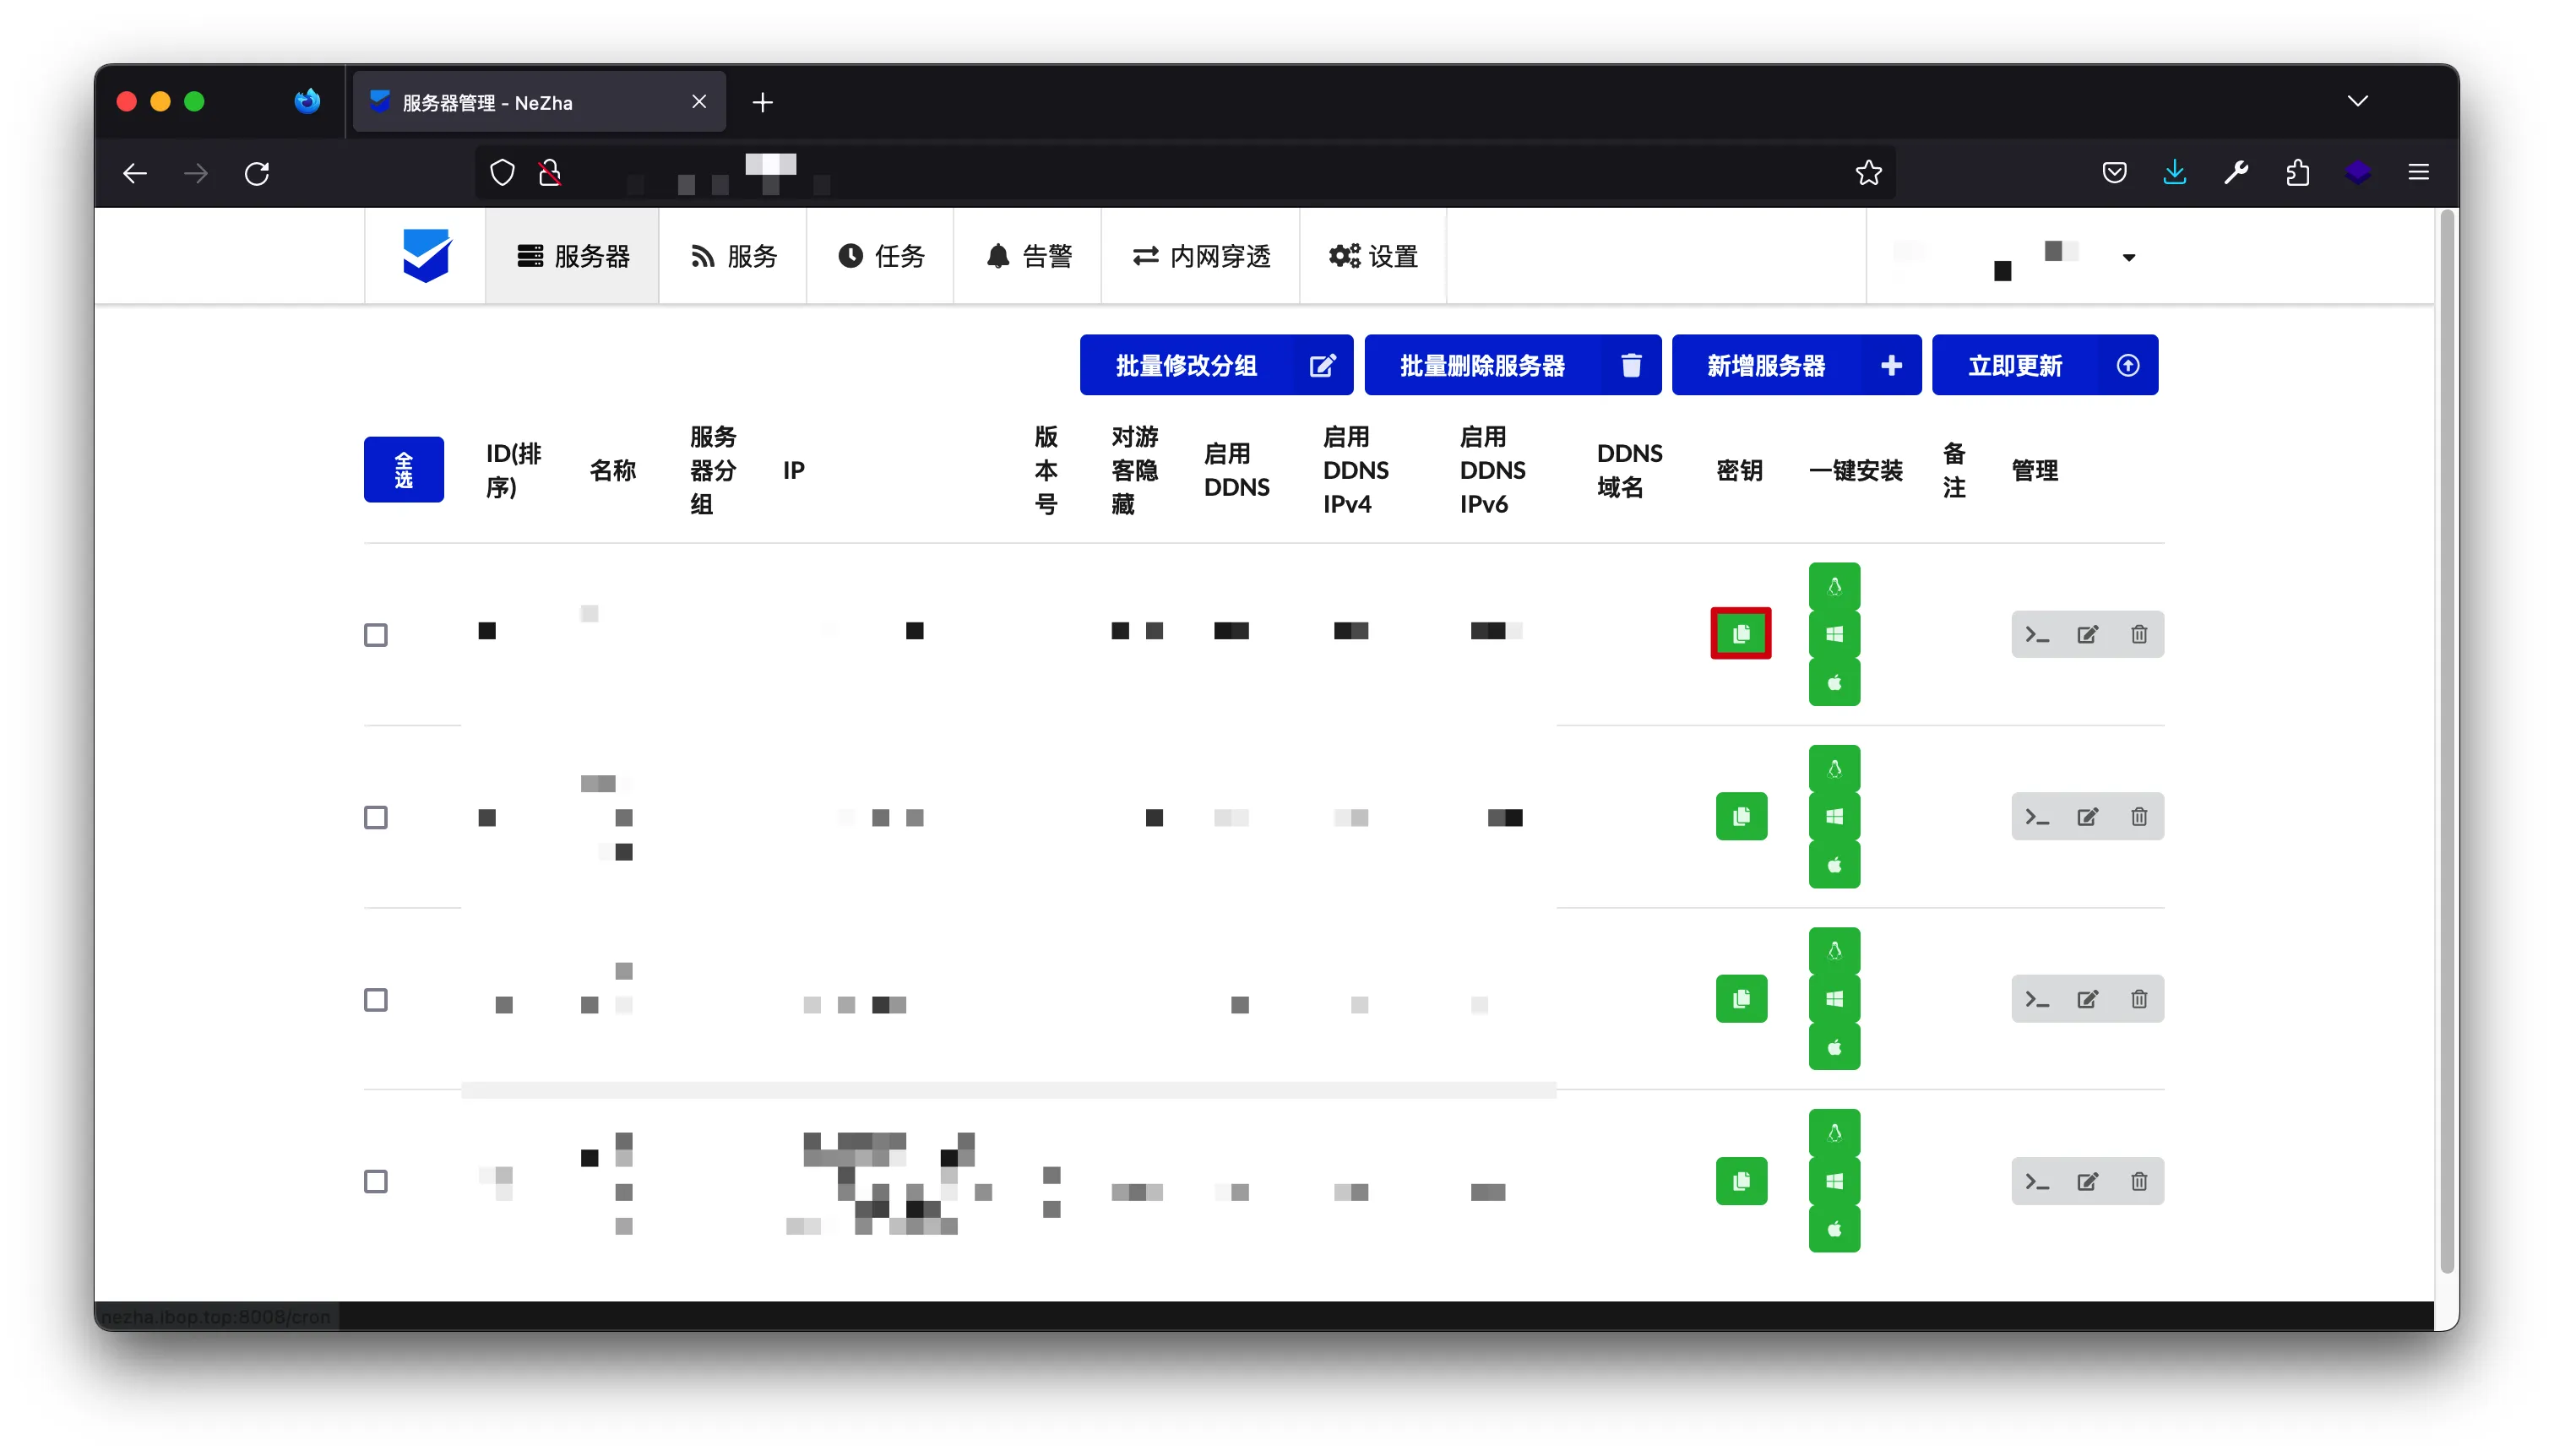
添加服务器配置
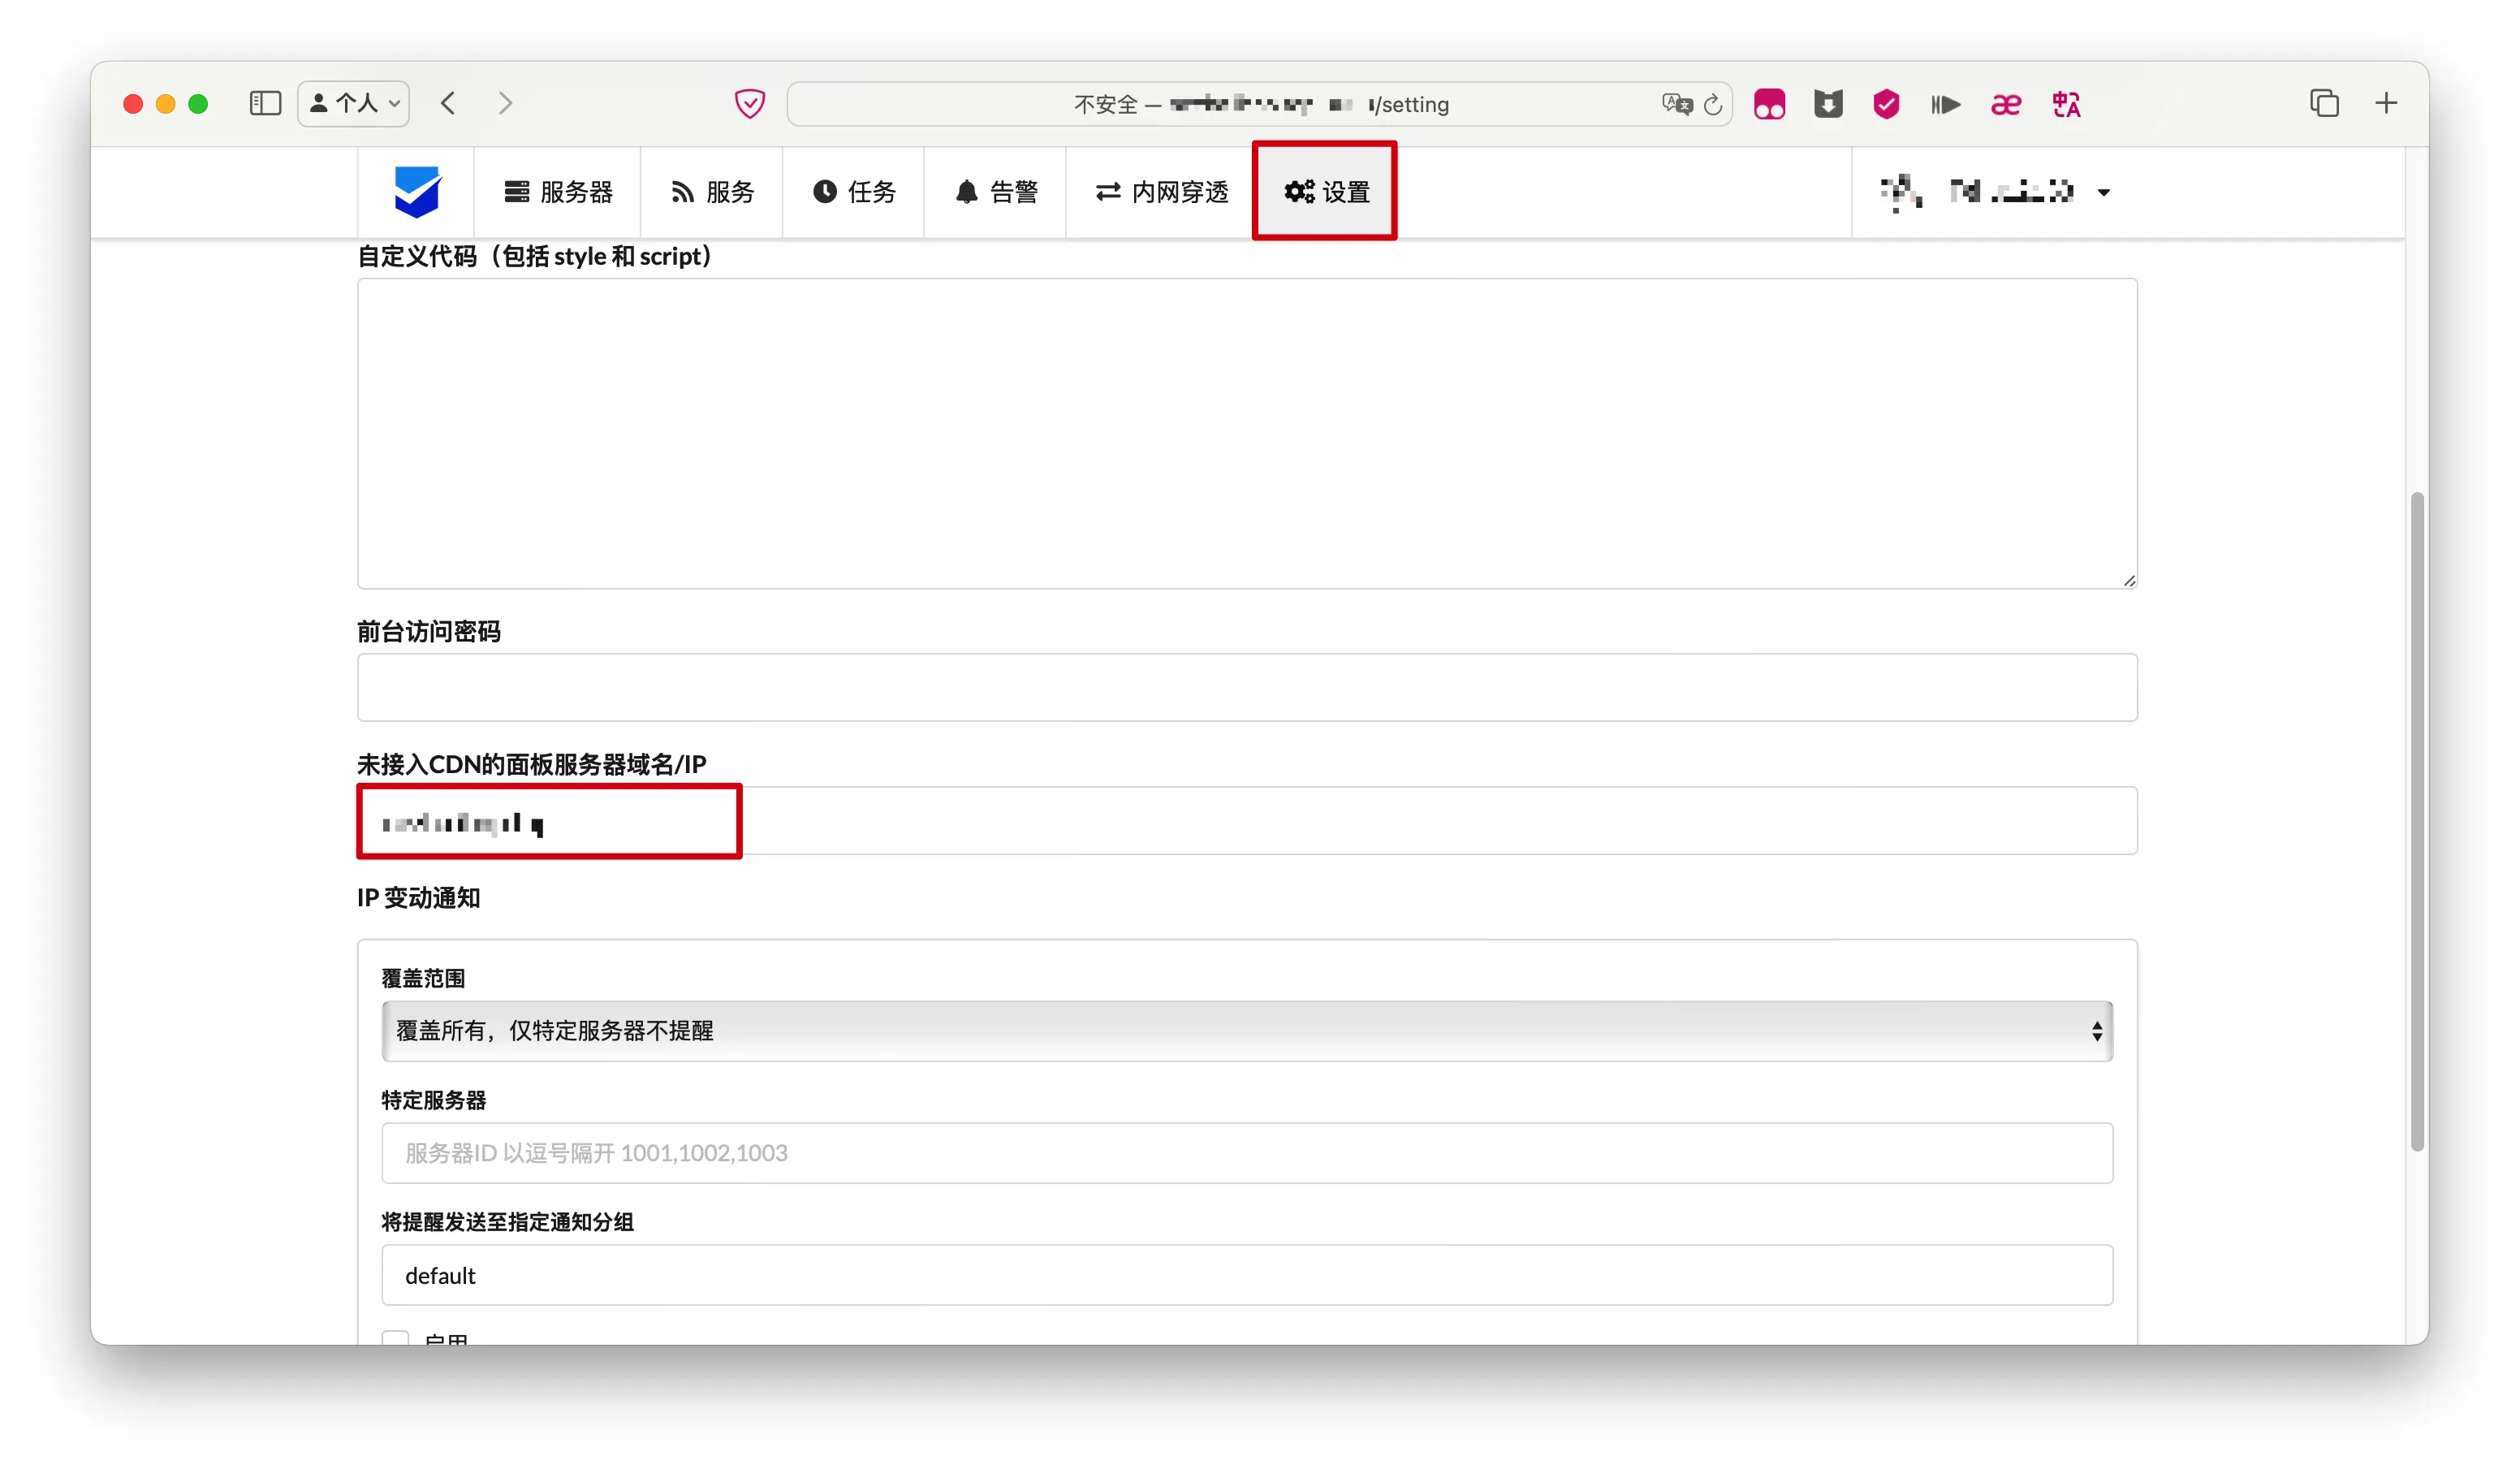
配置服务端域名或IP地址(可选)
如果不配置,不能复制客户端自动部署脚本
设置->配置未接入CDN的面板服务器域名/IP
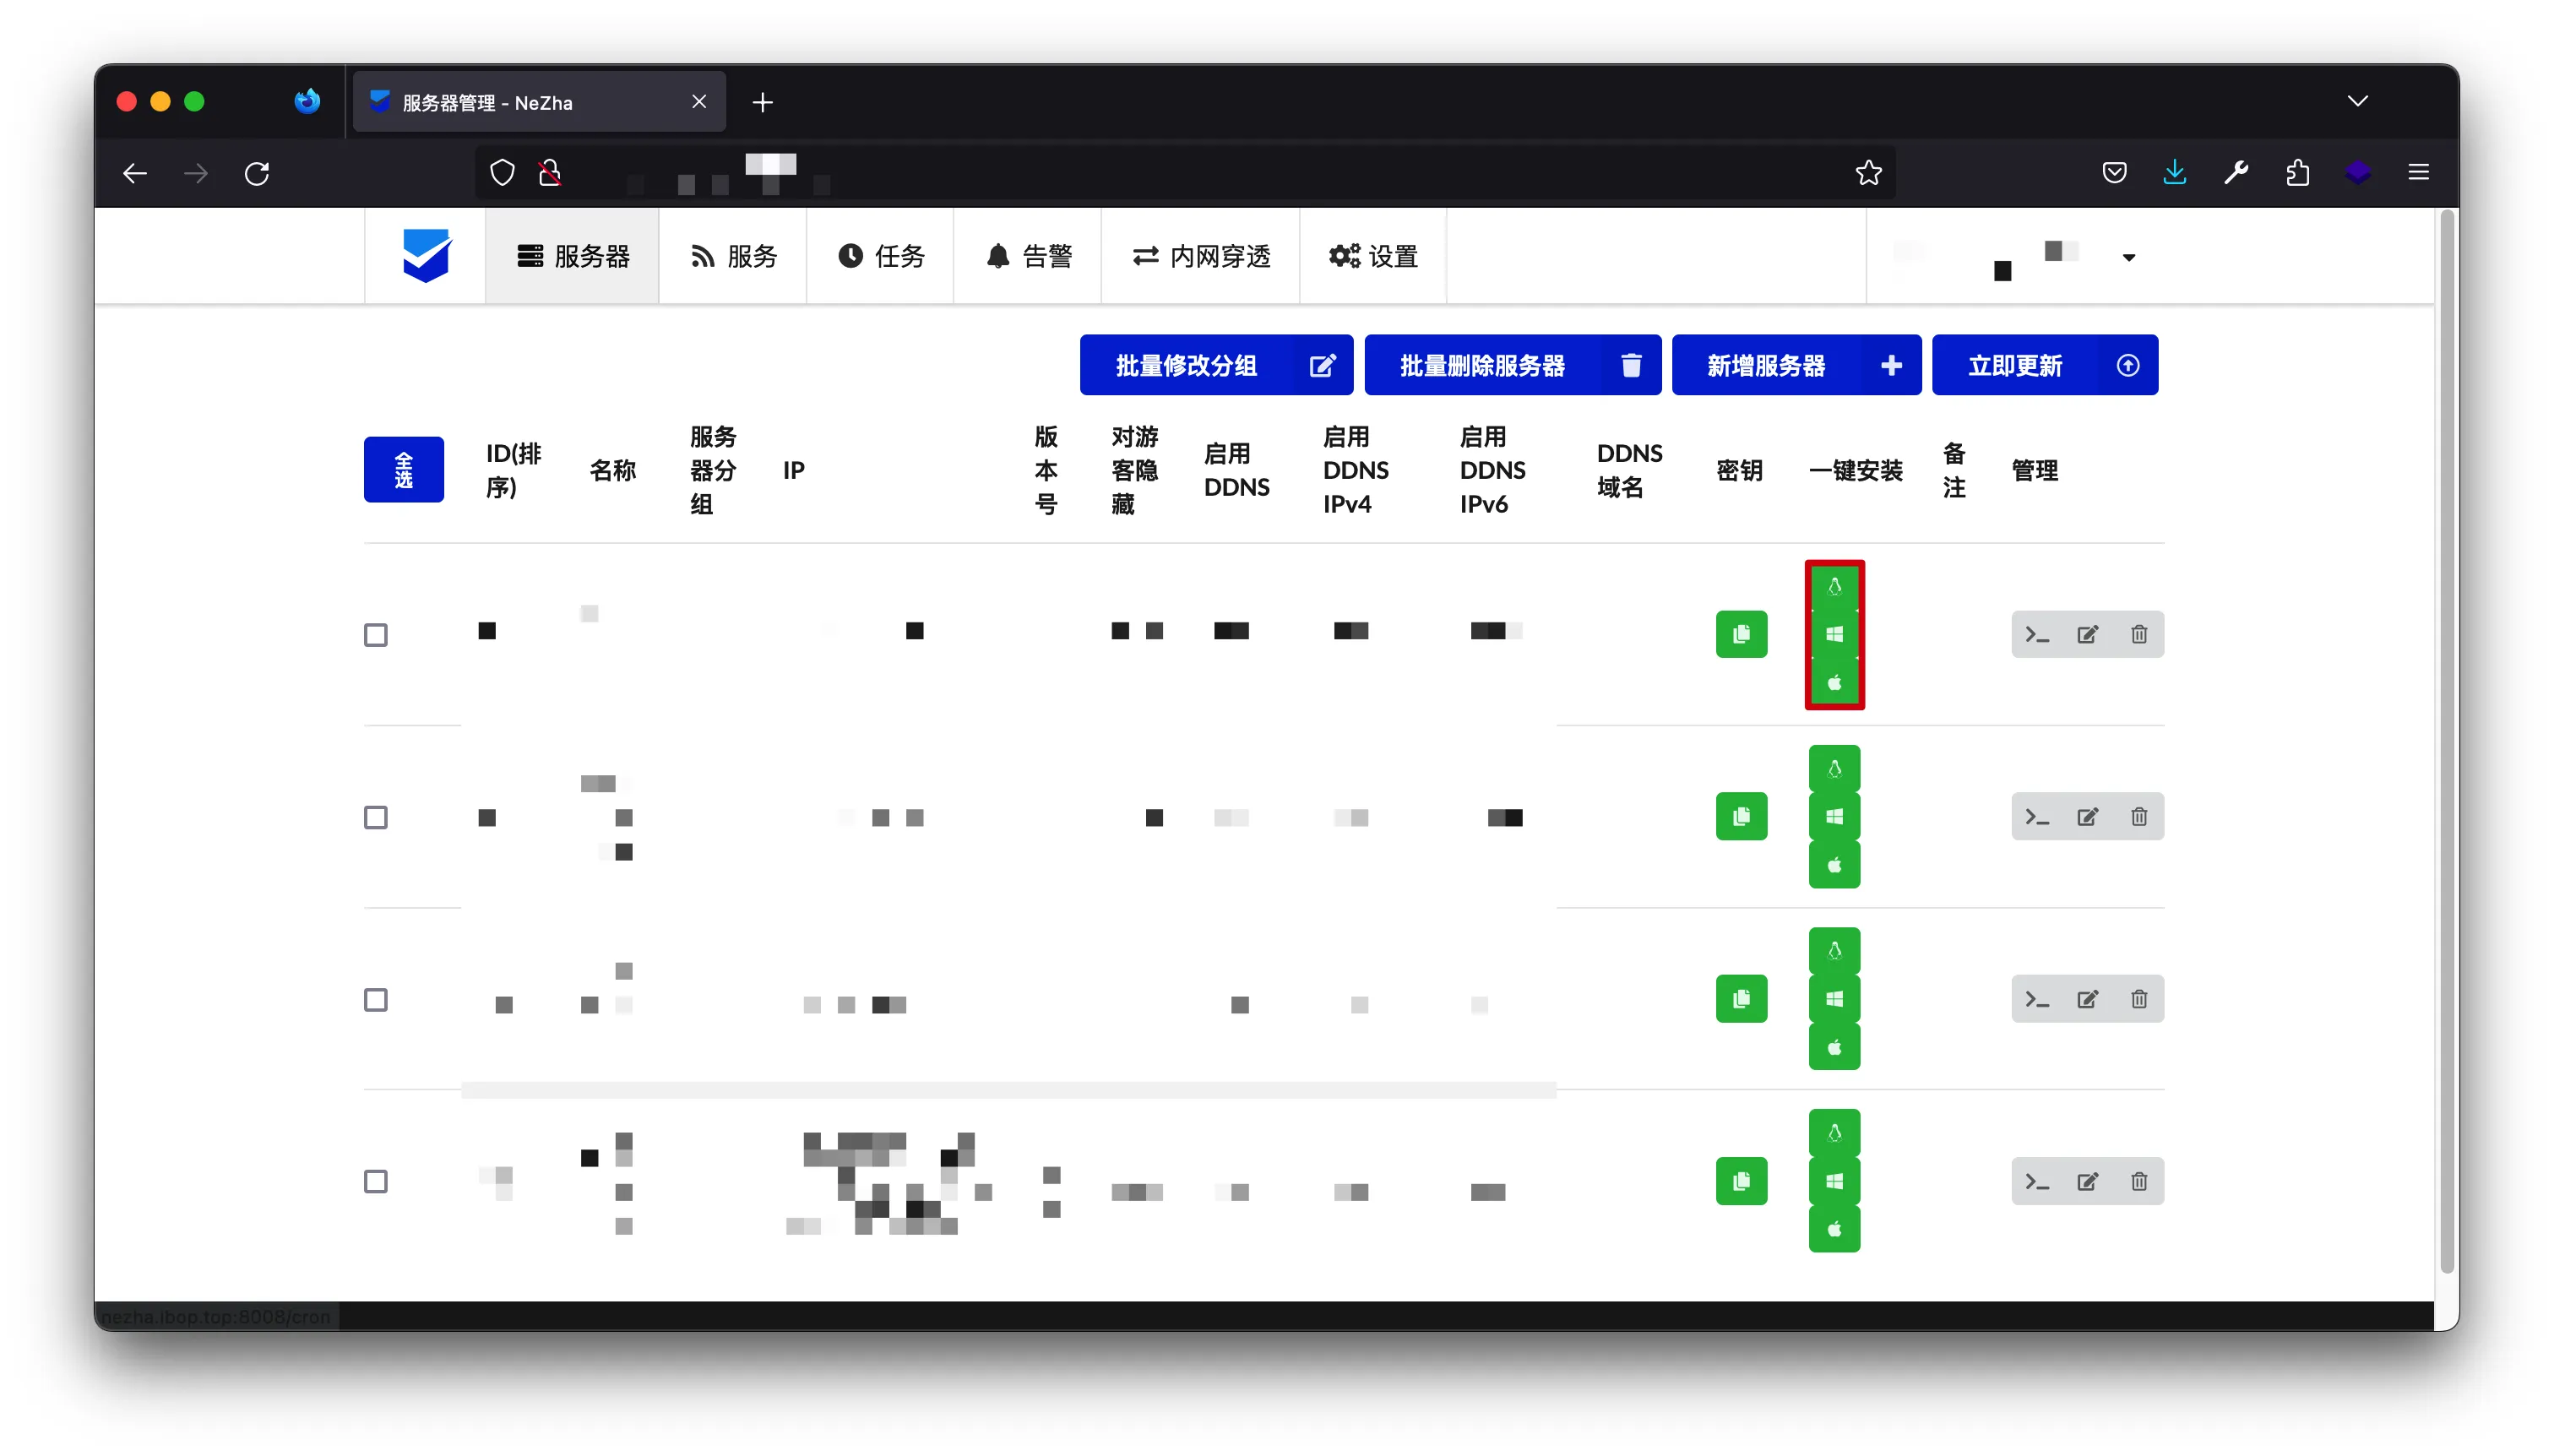
部署客户端
一键安装脚本自动部署客户端
Linux & MacOS
从服务端获取一键安装脚本
- 服务端管理后台->
服务器->复制对应平台的一键安装脚本
1
2
3
| curl -L https://raw.githubusercontent.com/naiba/nezha/master/script/install.sh -o nezha.sh
chmod +x nezha.sh
./nezha.sh install_agent <domain_or_ip> 5555 <agent_key>
|
Windows
从服务端获取Agent密钥
下载Agent
1
2
| certutil -urlcache -split -f https://github.com/nezhahq/agent/releases/download/v0.18.18/nezha-agent_windows_amd64.zip
"C:\Program Files\7-Zip\7z.exe" x nezha-agent_windows_amd64.zip
|
- 解压后得到
nezha-agent.exe可执行文件
部署
1
| .\nezha-agent.exe service install -s <domain_or_ip>:5555 -p <agent_key>
|
手动部署客户端
从服务端获取Agent密钥
Github脚本
1
2
3
| curl -L https://raw.githubusercontent.com/naiba/nezha/master/script/install.sh -o nezha.sh
chmod +x nezha.sh
./nezha.sh
|
Gitee脚本
1
2
3
| curl -L https://gitee.com/naibahq/nezha/raw/master/script/install.sh -o nezha.sh
chmod +x nezha.sh
CN=true ./nezha.sh
|
配置
<domain_or_ip>:服务端域名或IP地址
<agent_key>:上一步骤获取的Agent密钥
1
2
3
4
5
6
7
8
9
10
11
12
13
14
15
16
17
18
19
20
21
22
23
24
25
26
27
28
29
30
31
32
33
34
35
36
37
38
39
40
41
| 请自行选择您的安装方式(如果你是安装Agent,输入哪个都是一样的):
1. Docker
2. 独立安装
请输入选择 [1-2]:q
请输入正确的选择 [1-2]
请输入选择 [1-2]:1
哪吒监控管理脚本 v0.18.1
--- https://github.com/naiba/nezha ---
1. 安装面板端
2. 修改面板配置
3. 启动面板
4. 停止面板
5. 重启并更新面板
6. 查看面板日志
7. 卸载管理面板
————————————————-
8. 安装监控Agent
9. 修改Agent配置
10. 查看Agent日志
11. 卸载Agent
12. 重启Agent
————————————————-
13. 更新脚本
————————————————-
0. 退出脚本
请输入选择 [0-13]: 8
> 安装监控Agent
正在获取监控Agent版本号
当前最新版本为: v0.18.0
正在下载监控端
> 修改Agent配置
请先在管理面板上添加Agent,记录下密钥
请输入一个解析到面板所在IP的域名(不可套CDN): <domain_or_ip>
请输入面板RPC端口 (默认值 5555):
请输入Agent 密钥: <agent_key>
是否启用针对 gRPC 端口的 SSL/TLS加密 (--tls),需要请按 [y],默认是不需要,不理解用户可回车跳过:
Agent配置 修改成功,请稍等重启生效
* 按回车返回主菜单 *
|
完成
参考文献
哪吒官方文档
哪吒官方文档
nyko的博客